
Category: Training
-
 More ↗: June 2026 – Exercise 1
June 2026 – Exercise 1
✨ Try our first set of obstacles for refining your skills leading up to competition #15 ✨ Exercise #1 will be based on the Two…
-
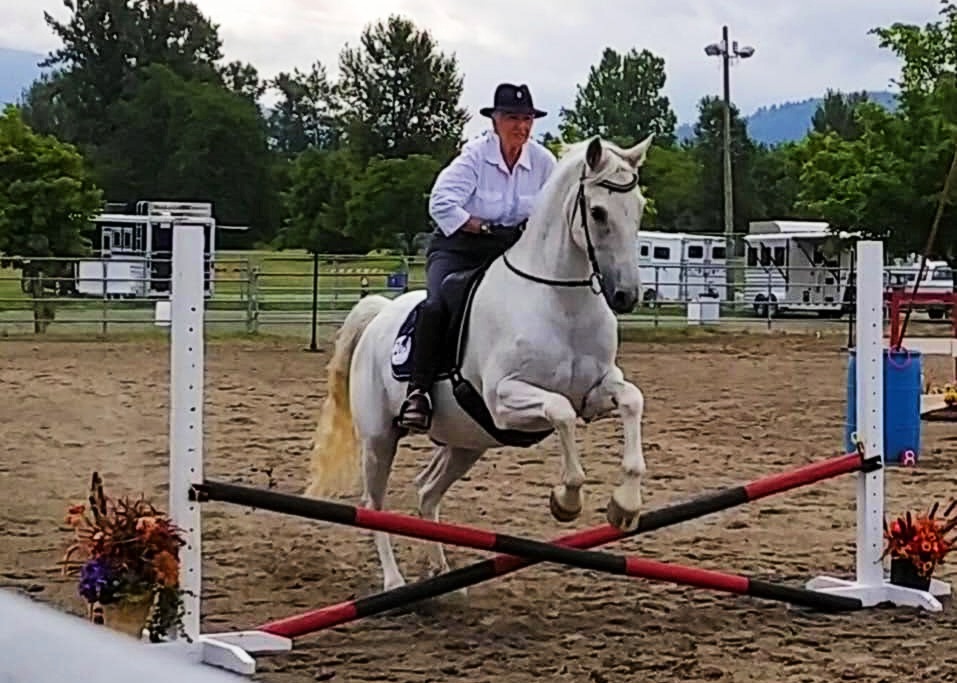 More ↗: Obstacle Spotlight: Jump
Obstacle Spotlight: Jump
The jump in Working Equitation is relatively small – the key is not about height it’s about willing workability, and a great partnership. Obstacle Setup:…
-
 More ↗: February 2026 – Exercise 2
February 2026 – Exercise 2
✨ Coming Up in February – Try Out Exercise #2! ✨ This exercise may be ridden or done in hand and includes a series of…
-
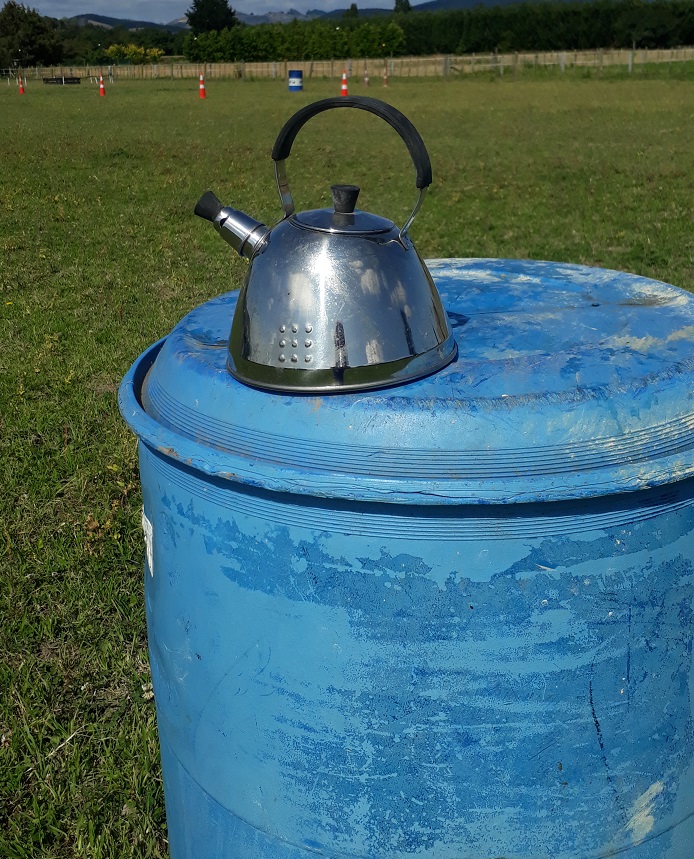 More ↗: Obstacle Spotlight: Jug Lift
Obstacle Spotlight: Jug Lift
The Jug Lift tests the ability of the horse to wait patiently and willingly while the rider completes a task. While the obstacle looks simple,…
-
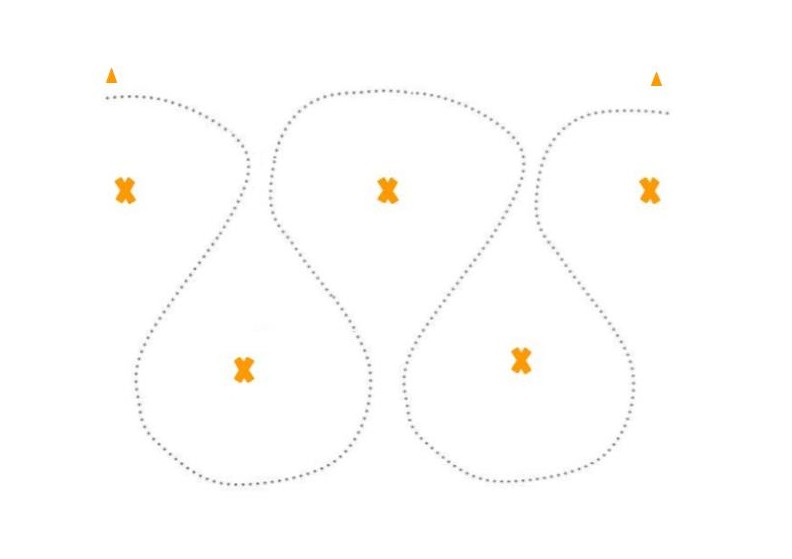 More ↗: Obstacle Spotlight: Double Slalom
Obstacle Spotlight: Double Slalom
Setup requirements: Preparatory & Preliminary (Requirements for VWE course): • Two slalom lines using 5 poles • Initial line of 3 upright poles or cones…
-
 More ↗: Obstacle Spotlight: Bell Corridor
Obstacle Spotlight: Bell Corridor
Setup requirements: • Two poles forming the corridor • An upright mechanism at the end of the corridor to hold the bell • Bell height…
-
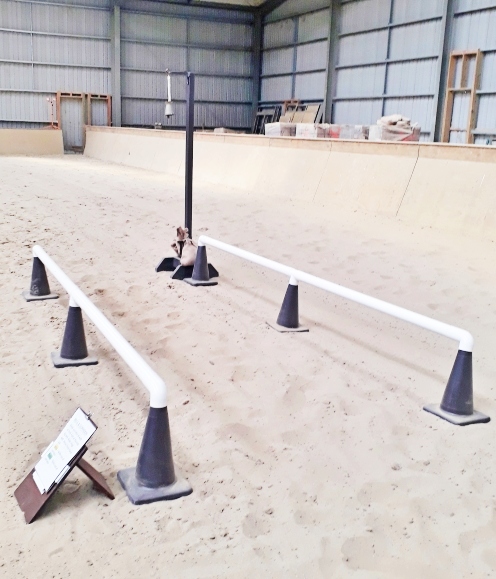
 More ↗: Obstacle Spotlight: Single Slalom
Obstacle Spotlight: Single Slalom
Gait expectations * Introductory: Walk or trot Obstacle Setup * A straight line of five upright posts or markers * Evenly spaced at approximately 7…
-
More ↗: New Year – New goals!
New Year – New goals!
Virtual Working Equitation is excited to bring you our next series of exercises leading up to the March/April 2026 competition (#14) EXERCISE 1 – January…
-
 More ↗: Rope Gate Obstacle
Rope Gate Obstacle
The Rope Gate obstacle is one of the most technical and revealing elements in Working Equitation’s Ease of Handling phase. It tests the partnership between…